
Patience is a Virtue: Understanding the Intracept Procedure Timeline
February 10, 2026
Is Foot Surgery Right for You? Understanding the Different Procedures
February 12, 2026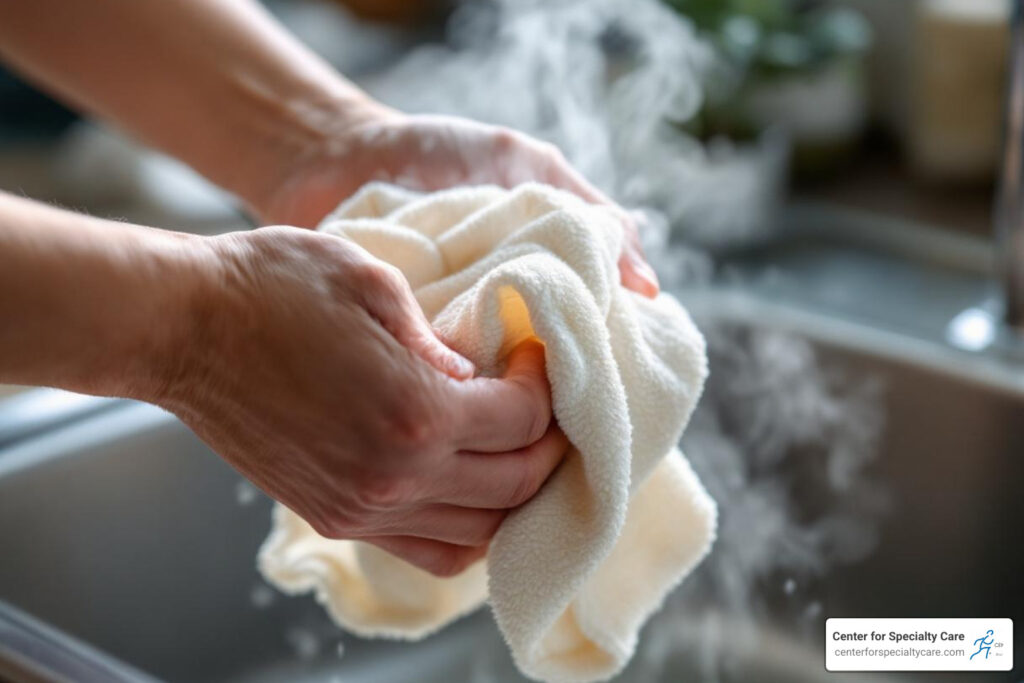
How to make a warm compress: 2 Easy Relief
Why Warm Compresses Work for Pain Relief
How to make a warm compress is easier than most people think—and it’s one of the most effective home remedies for muscle aches, joint stiffness, and certain types of pain.
Quick Answer: Two Simple Methods
-
Moist Warm Compress: Soak a clean washcloth in hot (not scalding) water, wring out excess, fold it, and apply to the affected area for 10-20 minutes.
-
Dry Warm Compress: Fill a clean sock with 1-2 cups of uncooked rice, tie it shut, microwave for 30-60 seconds, and apply for 10-20 minutes.
Both methods use common household items and cost almost nothing to make.
When you’re dealing with chronic muscle soreness, a stiff neck, or persistent joint pain, knowing how to make a warm compress can provide fast relief without a trip to the pharmacy. Heat therapy works by increasing blood flow to the affected area, which helps relax tight muscles, reduce stiffness, and speed up healing. Research shows that moist heat can relieve muscle soreness in one quarter of the time it takes dry heat to do the same.
But warmth isn’t always the answer. Cold therapy is better for fresh injuries, swelling, and inflammation. Understanding when to use heat versus ice makes all the difference in your recovery.
I’m Dr. Corey Welchlin, a board-certified orthopedic surgeon who has treated musculoskeletal pain for over 30 years at the Center for Specialty Care. Throughout my practice, I’ve guided countless patients on effective home remedies like how to make a warm compress as part of comprehensive pain management strategies.

Terms related to how to make a warm compress:
The Science of Soothing: Benefits of a Warm Compress
We’ve all experienced that sigh of relief when applying something warm to an aching body part. It’s not just a comforting sensation; it’s rooted in the science of heat therapy, also known as thermotherapy. When we apply a warm compress, it kickstarts several physiological processes that contribute to pain relief and healing.
Primarily, heat increases blood flow to the targeted area. This vasodilation—the widening of blood vessels—brings a fresh supply of oxygen and nutrients, which are crucial for repairing damaged tissues. Increased circulation also helps flush away metabolic waste products, like lactic acid, that can accumulate in sore muscles after exercise, contributing to that familiar ache.
Beyond circulation, warm compresses excel at muscle relaxation. The warmth helps to loosen tight muscles, ease spasms, and reduce the stiffness that often accompanies injuries or chronic conditions. This relaxation can also help to reduce the transmission of pain signals to the brain, providing a natural analgesic effect. For those managing persistent discomfort, incorporating warm compresses into your routine can be a valuable part of your overall Pain Management plan.
Moist vs. Dry Heat: Which is More Effective?
When we talk about heat therapy, we often differentiate between moist and dry heat. While both can provide comfort, they have distinct properties that make them suitable for different situations.
Moist heat, delivered through a damp cloth or a specialized moist heating pad, is generally considered more effective than dry heat for penetrating deeper into muscle tissue. The moisture helps to transfer heat more efficiently, allowing it to reach and relax underlying muscles and joints more thoroughly. A 2013 study found that moist heat helped relieve muscle soreness in one quarter of the time it took for a compress using dry heat to do the same. This makes moist heat particularly beneficial for deep muscle aches, sinus headaches, and congestion.
Dry heat, such as that from an electric heating pad or a rice sock, can be convenient and less messy. It’s excellent for surface-level pain and stiffness, providing a soothing warmth without the added moisture. However, it may not penetrate as deeply or retain heat as long as a moist compress.
Here’s a quick comparison:
| Feature | Moist Heat | Dry Heat |
|---|---|---|
| Effectiveness | Generally more effective for deep tissue pain | Good for surface-level pain and stiffness |
| Penetration | Deeper | Shallower |
| Heat Retention | Better, transfers heat more efficiently | May need more frequent reheating |
| Best Uses | Muscle soreness, sinus congestion, joint pain | General aches, stiffness, convenience |
| Convenience | Requires dampness, can be messier | Less messy, easy to prepare and use |
How to Make a Warm Compress: Simple DIY Methods
The beauty of a warm compress lies in its simplicity and accessibility. You don’t need fancy equipment or a trip to the store; you can easily make one using common household items. This makes it a cost-effective and immediate solution for various aches and pains. Let’s explore how to make a warm compress using both moist and dry methods.
How to make a moist warm compress
Moist compresses are fantastic for targeting muscle soreness, easing congestion, or helping with eye conditions. We have a couple of easy methods for you:
Method 1: The Basin Method (Classic Washcloth)
This is the simplest way to create a moist warm compress.
Materials needed:
- A clean, soft washcloth or small hand towel
- A bowl or basin
- Hot (but not scalding) water from the tap
Steps:
- Fill your bowl or basin with hot water. It should be warm enough to be therapeutic, but never so hot that it could burn your skin. We recommend testing the water temperature on the inside of your wrist or elbow first.
- Submerge the clean washcloth completely in the warm water.
- Carefully wring out the excess water until the cloth is damp but not dripping.
- Fold the washcloth into a comfortable size and shape for the area you’ll be treating.
- Apply the warm compress to the affected area.
- Leave it on for 10 to 20 minutes. As the compress cools, you can re-soak it in the warm water and reapply.
Method 2: The Microwave Method (for longer-lasting warmth)
This method helps the compress retain heat for a longer period.
Materials needed:
- Two clean washcloths or small hand towels
- A microwave-safe plastic bag (like a Ziploc bag) or plastic wrap
- A microwave
- Water
Steps:
- Wet one washcloth thoroughly with water.
- Wring out the excess water, leaving it damp.
- Place the damp washcloth in the microwave-safe plastic bag. Leave the bag unsealed or slightly open to allow steam to escape. If using plastic wrap, wrap the damp cloth loosely.
- Microwave the cloth for approximately 30-60 seconds. Heating times can vary, so start with less and add time if needed, in 10-second increments.
- Carefully remove the bag/wrap from the microwave (it will be hot!). If using a bag, seal it tightly.
- Wrap the microwaved compress in the second dry washcloth. This acts as a protective layer and helps distribute the heat evenly.
- Always test the temperature on the back of your hand before applying it to your skin. It should feel warm and soothing, not hot or painful.
- Apply for 10 to 20 minutes.

How to make a dry warm compress
Dry warm compresses are excellent for general muscle aches, stiffness, or when you prefer a less messy option. The rice sock is a popular and effective choice.
Method: The Rice Sock Method
This DIY heating pad is simple to make and can be reheated many times.
Materials needed:
- 1 new, clean tube sock (preferably cotton)
- 1-2 cups of uncooked rice (white rice works well, but you can also use beans, corn, or oats)
- A microwave
- Optional: Essential oils (like lavender for relaxation) or dried herbs for a pleasant aroma
Steps:
- Fill the clean tube sock three-quarters full with uncooked rice.
- Tie a secure knot at the open end of the sock, ensuring the rice cannot spill out. You want it to be flexible, not packed too tightly.
- Place the rice sock in the microwave.
- Heat the sock in the microwave for 30 seconds at a time, checking the temperature after each interval, until you reach your desired warmth. Typically, 60-90 seconds is sufficient.
- Always test the temperature on the back of your hand or wrist before applying it to your body. It should be comfortably warm, not hot.
- For extra comfort and protection, you can wrap the heated rice sock in a thin towel before applying.
- Apply the dry compress to the affected area for 10 to 20 minutes. Reheat as needed.

This type of dry compress is particularly useful for localized pain, such as a stiff neck, back pain, or even for conditions like tendonitis. If you’re wondering Does Heat Help Tendonitis? Answers & Tips for Effective Relief, a warm compress can indeed be beneficial for chronic tendon pain, promoting blood flow and relaxation after the acute phase of injury.
Applying Your Compress Safely and Effectively
Using a warm compress is a wonderful way to find relief, but safety should always be our top priority. Improper use can lead to burns or worsen certain conditions.
Here are our essential safety precautions:
- Temperature Testing is Key: This cannot be stressed enough! Always test the temperature of your compress on a less sensitive area of your skin, like the back of your hand or wrist, before applying it to the affected area. It should feel comfortably warm, not hot or painful. The ideal therapeutic temperature is around 45°C (113°F). If it’s too hot, let it cool for a minute or two before applying.
- Use a Protective Barrier: Even with a safe temperature, we recommend placing a thin towel or cloth between the warm compress and your skin, especially for moist compresses or if you have sensitive skin. This helps prevent direct contact burns and distributes the heat more evenly.
- Application Duration: Generally, a warm compress should be applied for 10 to 20 minutes at a time. Leaving it on for too long can sometimes lead to skin irritation or even burns, especially with electric heating pads.
- Check Your Skin Regularly: While the compress is applied, periodically check the skin for excessive redness, blistering, or discomfort. If you notice any of these, remove the compress immediately.
- Never Sleep with a Compress: Do not fall asleep while using a warm compress, especially an electric heating pad. This can lead to prolonged exposure and severe burns.
- Cleanliness: For moist compresses, always use a clean washcloth. If using for an infection (like a stye), use a fresh, clean cloth for each application to prevent spreading bacteria. Wash reusable cloths thoroughly after each use.
Understanding these precautions is crucial to ensure that heat therapy provides comfort and relief without any unwanted side effects. For a more comprehensive look at potential risks, we encourage you to review Potential Risks and Contraindications of Heat Therapy.
When to Avoid Using a Warm Compress
While warm compresses are generally safe and effective, there are specific situations where we should avoid them:
- Acute Injuries (First 48 Hours): For fresh injuries like sprains, strains, or bruises, heat can actually worsen swelling and inflammation. In these cases, cold therapy is generally more appropriate.
- Open Wounds or Broken Skin: Never apply a warm compress directly to an open wound, cuts, or broken skin, as this can increase the risk of infection.
- Swelling or Inflammation: If the affected area is visibly swollen or inflamed, heat can exacerbate these symptoms. Use cold instead.
- Bleeding Wounds: Heat increases blood flow, which is counterproductive for bleeding injuries.
- Certain Medical Conditions: If you have conditions such as diabetes, peripheral vascular disease, deep vein thrombosis (DVT), eczema, dermatitis, or impaired sensation (e.g., due to neuropathy), consult your doctor before using heat therapy. These conditions can increase your risk of burns or other complications.
- Pregnancy: Pregnant individuals should avoid warm compresses, especially around the stomach area, without consulting a healthcare provider.
- After Alcohol Consumption: Avoid using heat therapy after consuming alcohol, as your ability to sense temperature changes might be impaired.
When in doubt, always consult with a healthcare professional before applying heat therapy, especially if you have an underlying medical condition.
Hot vs. Cold Therapy: When to Choose Ice
Just as knowing how to make a warm compress is important, understanding when to reach for an ice pack is equally crucial for effective pain management. Heat and cold therapies work in opposite ways and are best suited for different types of pain and injury.
Cold therapy, or cryotherapy, works by constricting blood vessels, which reduces blood flow to the injured area. This helps to:
- Numb pain: The cold slows nerve impulses, providing a local anesthetic effect.
- Reduce swelling: By limiting blood flow, cold therapy minimizes fluid accumulation in the tissues.
- Decrease inflammation: It helps to reduce the inflammatory response, which is often a source of pain and discomfort.
We typically recommend cold therapy for acute injuries, meaning those that have occurred recently—usually within the first 48 hours. This includes conditions like:
- Sprains (e.g., ankle sprain)
- Strains (e.g., muscle pull)
- Bruises
- Acute flare-ups of conditions like tendonitis or bursitis
- Post-surgical swelling
For example, if you just twisted your ankle during a morning run or experienced a sudden muscle pull while lifting, an ice pack is your best friend. Apply a cold compress for 10-20 minutes at a time, several times a day, with at least 20-minute breaks in between applications.
How to make a simple ice pack:
- Place ice cubes in a plastic, sealable bag.
- Partially fill with water (this helps it conform better).
- Seal the bag, squeezing out any excess air.
- Wrap the bag in a damp towel or cloth.
- Apply to the affected area. Never apply ice directly to the skin, as this can cause frostbite.
Understanding when to use ice versus heat is a fundamental aspect of self-care for musculoskeletal issues and a common topic in Sports Medicine. If you’re unsure, remember this general rule: “Ice for acute, heat for chronic.”
Frequently Asked Questions about Making a Warm Compress
We often get questions from our patients about the best ways to use warm compresses. Here are some of the most common inquiries we address:
Is a moist or dry warm compress better for muscle pain?
For muscle pain, especially deeper muscle soreness or chronic stiffness, a moist warm compress is generally more effective. As we discussed, the moisture helps the heat penetrate deeper into the tissues, providing more thorough relaxation and increasing blood flow to those hard-to-reach muscle fibers. This can be particularly beneficial for conditions like a stiff neck, back pain, or shoulder discomfort. While a dry compress offers comfort, its heat doesn’t typically penetrate as deeply.
Can I use a warm compress for a stye or other eye issues?
Absolutely! Warm compresses are a widely recommended home remedy for various mild eye conditions, including:
- Styes: These painful red bumps on the eyelid occur when an oil gland becomes blocked or infected. A warm compress helps to soften the blockage and promote natural drainage. NYU Langone eye specialists recommend using a stye warm compress four to five times a day.
- Dry Eyes: Warm compresses can stimulate the meibomian glands (tiny glands in your eyelids that produce essential oils for your tear film). When these glands are blocked, tears evaporate too quickly, leading to dry eyes. Heat helps liquefy the oils, improving tear film quality.
- Chalazions: Similar to styes, these are usually non-infectious blockages of an oil gland.
- Blepharitis: Swollen eyelids can be soothed by warm compresses, which help clear debris and reduce inflammation.
When using a warm compress for your eyes, it’s crucial to:
- Use a clean, soft washcloth and clean water.
- Ensure the compress is warm, not hot, to protect the delicate skin around your eyes (aim for 45°C or 113°F).
- Apply it over closed eyelids for 10-15 minutes.
- If both eyes are affected, use separate clean washcloths and even separate bowls of water for each eye to prevent cross-contamination and the spread of infection.
- Avoid adding any substances like tea bags or Epsom salts to the water for eye compresses, as these can irritate the eyes.
How long should I leave a warm compress on?
The general guideline for applying a warm compress is 10 to 20 minutes at a time. This duration is usually sufficient to achieve the therapeutic benefits without risking skin irritation or burns.
However, the frequency and total application time can vary based on the condition we’re treating:
- General Muscle Pain/Stiffness: 15-20 minutes, 2-3 times a day as needed.
- Styes/Eye Issues: 10-15 minutes, 3-6 times a day for optimal results, or as often as 4-5 times a day as recommended by specialists.
- Chronic Conditions: For ongoing stiffness or pain, you might apply heat periodically throughout the day, ensuring breaks between applications to allow your skin to recover.
It’s always important to listen to your body. If the compress feels too hot or causes discomfort, remove it immediately. We also recommend checking your skin periodically during application for any signs of excessive redness.
For specific conditions, such as ongoing shoulder pain, incorporating warm compresses into a broader treatment plan, potentially including Shoulder Treatment with Physical Therapy: Recovery & Pain Relief, can be very effective. Your physical therapist or doctor can provide custom advice on application duration and frequency.
Conclusion: Take the Next Step Towards Pain Relief
Knowing how to make a warm compress is a simple yet powerful tool in your home remedy arsenal. Whether you opt for a moist washcloth or a cozy rice sock, these DIY heat packs offer an accessible and cost-effective way to soothe muscle aches, ease joint stiffness, and alleviate discomfort from various conditions, from sinus congestion to eye issues. The key to effective use lies in understanding the science behind heat therapy, choosing the right type of compress (moist vs. dry), and, most importantly, practicing safety by checking temperatures and respecting application times.
While warm compresses provide wonderful temporary relief and support the healing process, they are often part of a larger picture. If home remedies don’t provide lasting relief for your joint or muscle pain, or if your symptoms worsen, it’s a sign to seek professional guidance. At Center for Specialty Care in Fairmont, MN, Estherville, IA, Buffalo Center, IA, and St James, MN, our team of orthopedic and pain management specialists is here to help you find a personalized solution. We pride ourselves on 100% patient satisfaction, personalized care, and quick appointment availability, ensuring you get the expert attention you deserve. Explore our orthopedic services to find how we can help you on your journey to lasting comfort and improved well-being.

